
Invitations
Invitations let you bring people into your organization by email. Recipients click a one-time link in the email, register (or sign in), and are automatically attached to your org with the right access level.
How to Invite Someone
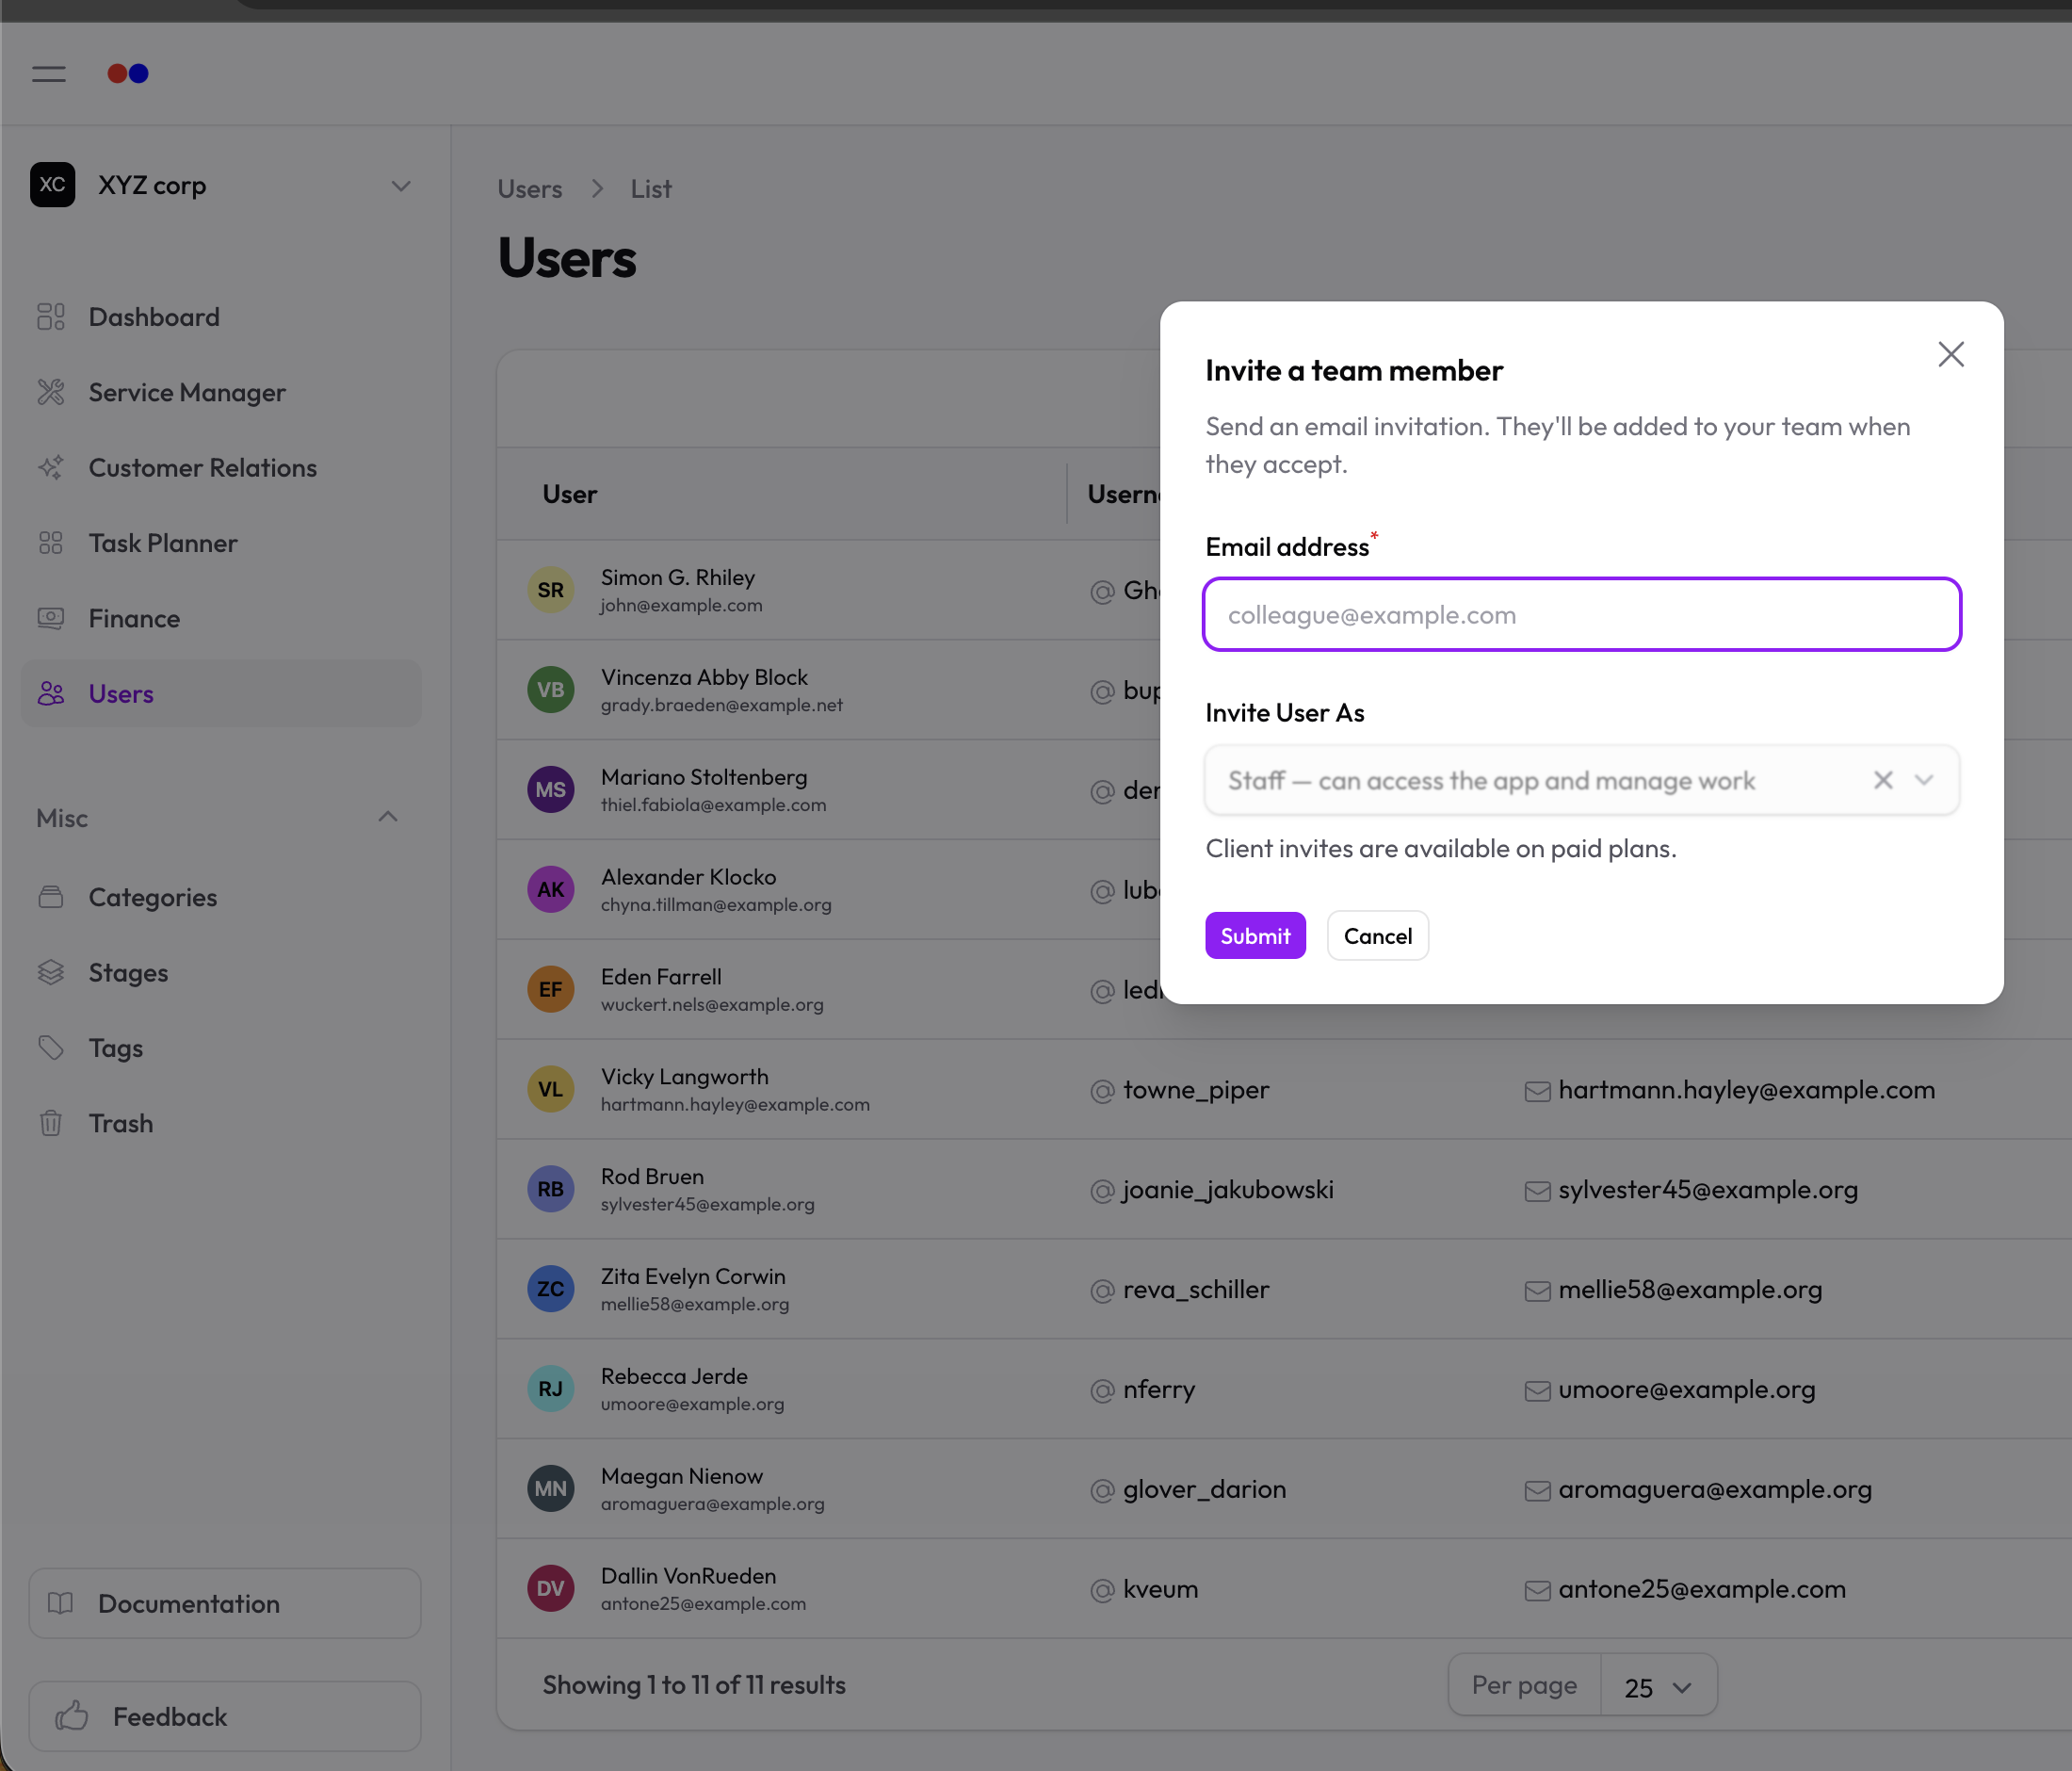
- Go to Users → Users and click Invite user, or Users → Invitations and click Invite user
- Enter their email address
- Choose Invite User As:
- Staff — full access to the app and managing work
- Client — limited access via the Client Portal only
- (On paid plans) Review the per-seat charge notice — adding a user adjusts your Stripe subscription quantity by one seat
- Click Send invitation
The recipient gets an email with a one-time link valid for 7 days.
What the Recipient Sees
- If they have no HollowPurple account yet, the link takes them to a registration form pre-filled with their email. After registering, they're automatically attached to your org and their email is treated as verified (the invite link itself is the proof).
- If they already have an account, they're prompted to sign in and accept the invitation.
Assigning Roles (Staff only)
When inviting someone as Staff, you can select one or more Roles to grant them — defaults to the standard Staff role if you don't pick any. Roles determine what they can see and do once they accept; see Roles & Permissions. Client invites skip this step since portal access is fixed. Selected roles are preserved if you later resend the invitation, and can be changed at that point too.
Pending Invitations
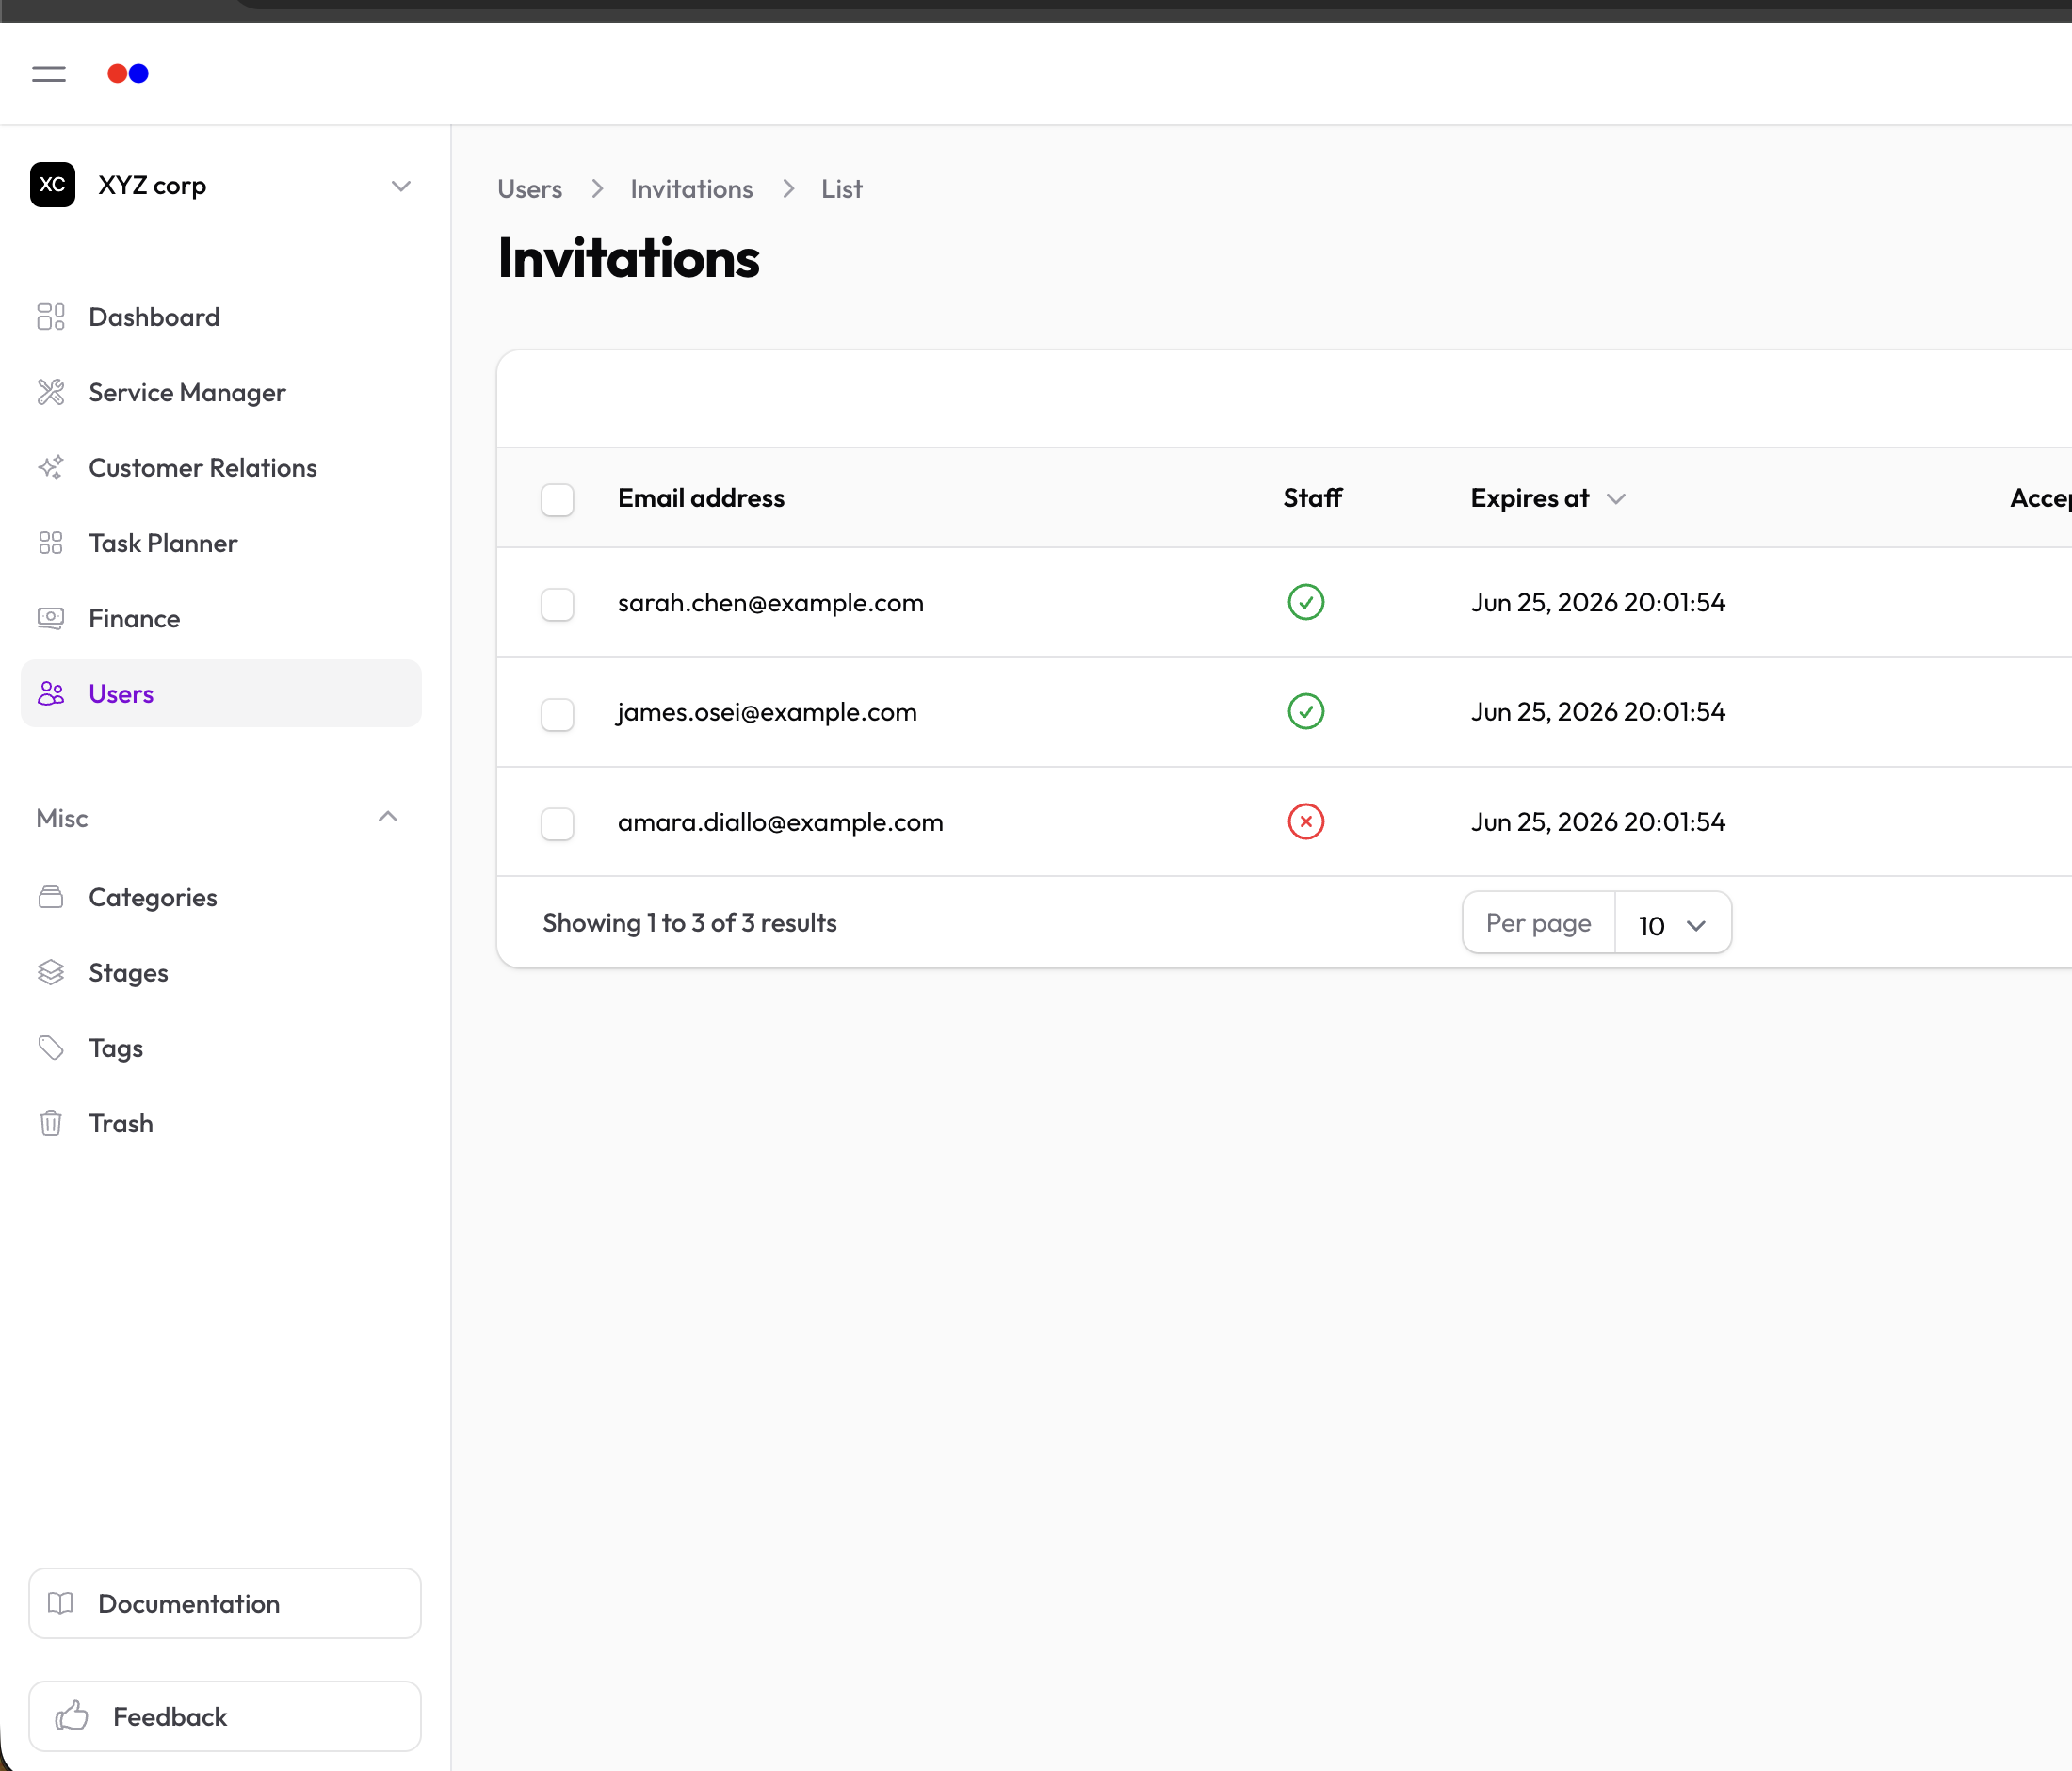
The Users → Invitations page lists every invitation sent for your organization, with:
- Staff? — whether they were invited as staff or client
- Expires at — invites expire after 7 days
- Accepted — shows when (or if) the invite has been accepted
Resending an Invitation
If someone's link expires, or they never received the email:
- Find the invitation in the list (only non-accepted invites can be resent)
- Click Resend
- Optionally update the email address or staff/client choice
- Click Resend in the modal
A fresh token is generated, the expiry resets to 7 days from now, and a new invitation email is queued.
Cancelling an Invitation
Use the row's delete action to revoke a pending invite. The link in their email will stop working immediately.
Plan Limits
- Free plan — capped at 3 total users. Once you've hit the cap, the Invite user button warns you and the send is blocked even if the UI is bypassed.
- Paid plans — unlimited users; each new user is one billable seat.
See Plans & Billing for details on per-seat charges.
Tips
- Invitations are per organization. Inviting the same person to two orgs sends two separate invitations.
- If a user is already a member of the org, the invite is rejected with a friendly notice.
- Sending a new invite for an email that already has a pending invite replaces the old one.